
Your car’s headlamp lenses play a crucial role in keeping you safe on the road. Over time, they can get cloudy, dirty, or scratched, making your lights dimmer and reducing your visibility at night.
You might not realize how much this affects your driving until it’s too late. But don’t worry—cleaning your headlamp lenses is easier than you think. You’ll discover simple, effective methods to restore your headlights to their original clarity. Keep reading, and you’ll learn how to improve your night vision and drive with confidence again.
Why Clean Headlamps Matter
Clean headlamp lenses are important for many reasons. They help your car’s lights work better. Clear lenses let more light out. This makes driving safer and easier. Dirty or cloudy headlamps reduce light and cause problems. Understanding why clean headlamps matter helps you care for your vehicle.
Impact On Visibility
Dirty headlamps block light from shining bright. This lowers how far you can see at night. Fog, rain, or snow make driving harder with dim lights. Clean lenses improve the brightness and distance of your headlights. Better visibility helps you spot obstacles and other cars sooner.
Safety Considerations
Clear headlamps keep you and others safe on the road. Bright lights help other drivers see your vehicle. Cloudy lenses increase the risk of accidents. Properly cleaned headlamps reduce chances of crashes. They improve your reaction time to hazards in low light.
Appearance And Vehicle Value
Clean headlamps make your car look cared for and newer. Yellowed or hazy lenses look old and worn out. This lowers your car’s overall appeal. Well-maintained lights can increase your vehicle’s resale value. Clean lenses show buyers you take good care of your car.
Common Causes Of Headlamp Cloudiness
Headlamp lenses can become cloudy over time, reducing light output and safety. Understanding the common causes of this cloudiness helps keep headlights clear and bright. Dirt, UV rays, and moisture often play a big role. Each factor affects the lens differently and needs the right cleaning approach.
Uv Damage
Sunlight contains ultraviolet (UV) rays that harm headlamp lenses. UV rays break down the plastic surface, making it foggy and yellow. This damage happens slowly but worsens with long exposure. Cars parked outside face more UV damage than those in garages.
Dirt And Grime Build-up
Road dust, mud, and bugs stick to the lenses and cause cloudiness. Dirt builds up over time and blocks light from shining through. Washing the lenses regularly helps remove grime and keeps headlights clear. Tough stains need special cleaners or polishing.
Moisture And Condensation
Water can get inside the headlamp housing. This causes fog and drops to form on the lens inside. Moisture reduces visibility and can damage bulbs. Seals may wear out, allowing water in. Checking and fixing leaks keeps moisture away.
Tools And Materials Needed
Cleaning headlamp lenses requires a few simple tools and materials. Having the right items makes the job easier and more effective. Prepare everything before starting to save time and avoid interruptions.
Cleaning Solutions
Choose a gentle cleaning solution to remove dirt and grime. Mild soap mixed with water works well. Some people use vinegar or baking soda for tougher stains. Avoid harsh chemicals that can damage the lens surface.
Polishing Compounds
Polishing compounds help remove scratches and restore clarity. Use a product made for plastic or headlamp lenses. Apply gently with a soft cloth or sponge. This step brightens the lens and improves light output.
Protective Gear
Wear gloves to protect your skin from chemicals. Safety glasses keep your eyes safe from splashes. Use a mask if you work with strong cleaning agents. Safety first keeps the process safe and smooth.

Credit: www.youtube.com
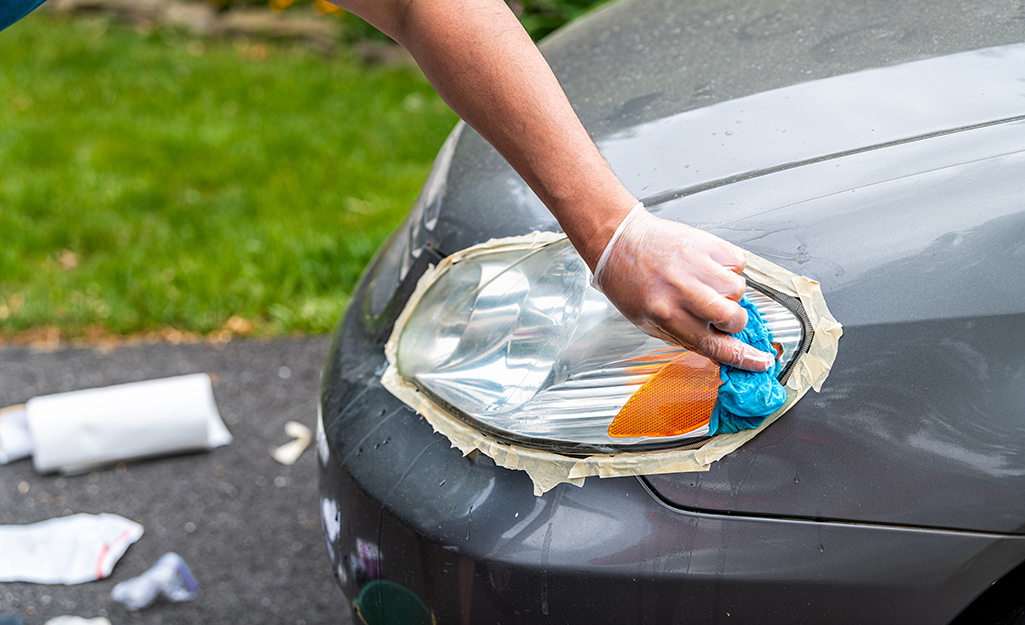
Step-by-step Cleaning Process
Cleaning headlamp lenses can restore brightness and improve your night driving safety. Follow this step-by-step process to bring back clear, clean lenses. Each step is simple and requires basic tools. Take your time for the best results.
Initial Wash And Dry
Start by washing the headlamp lenses with soap and water. Use a soft cloth or sponge to remove dirt and dust. Rinse well to clear away any soap residue. Dry the lenses completely with a clean towel. This prepares the surface for the next steps.
Sanding Techniques
Use fine-grit sandpaper to remove scratches and cloudiness. Begin with a 1000-grit sandpaper and sand in a horizontal motion. Keep the lens wet to avoid damage. Switch to 2000-grit sandpaper and sand vertically. This smooths out the surface for polishing.
Applying Polish
Apply a small amount of plastic polish to the lens. Use a soft cloth to rub the polish in circular motions. Polish until the lens looks clearer and smoother. This step helps remove fine scratches and haze.
Final Rinse And Dry
Rinse the lenses with clean water to remove polish residue. Dry them thoroughly with a microfiber cloth. Check the lenses for any spots or streaks. Your headlamps should now look clearer and brighter.
Diy Methods Using Household Items
Cleaning headlamp lenses can improve your car’s look and safety. Dirt and grime make lights dim and less effective. You do not need expensive tools. Some common household items work well for cleaning.
These DIY methods use simple things you already have. Each method is easy and quick to do. Try these to make your headlamps clear again.
Toothpaste Method
Use regular white toothpaste, not gel. Apply a small amount on a soft cloth. Rub the toothpaste on the lens in circles. Keep rubbing for about five minutes. Rinse with water and dry with a clean cloth. Toothpaste removes grime and light scratches gently.
Baking Soda Paste
Mix baking soda with water to make a thick paste. Spread the paste on the headlamp lens using a soft cloth. Rub in small circles for a few minutes. This paste cleans dirt and minor haze from the lens. Rinse well with water and wipe dry for best results.
Vinegar And Water Solution
Combine equal parts of white vinegar and water in a spray bottle. Spray the solution onto the headlamp lens. Let it sit for a few minutes to loosen dirt. Use a soft cloth to wipe the lens clean. Rinse with water and dry with a towel. Vinegar cuts through grime and leaves the lens clear.

Credit: www.reddit.com
Preventing Future Headlamp Damage
Protecting your headlamp lenses keeps them clear and bright longer. Dirt, sun, and weather wear down the plastic. Taking steps to prevent damage saves money and improves safety. Regular care helps you avoid costly repairs and replacements.
Applying Uv Sealant
UV rays cause headlamp plastic to yellow and crack. Applying a UV sealant creates a protective layer. This layer blocks harmful sun rays and slows damage. Use a clean cloth to spread the sealant evenly. Let it dry fully before driving.
Regular Maintenance Tips
Clean your headlamps often with mild soap and water. Avoid harsh chemicals that can erode the plastic surface. Check for small scratches or dirt build-up weekly. Quickly remove bugs, dirt, or bird droppings to stop stains. Regular cleaning keeps the lenses clear and safe.
Parking Strategies
Park your car in shaded areas to protect lenses from sun damage. Avoid parking under trees that drop sap or leaves. Use a car cover if shade is not available. This simple step reduces exposure to weather and pollutants. Good parking habits extend the life of your headlamps.
When To Seek Professional Help
Sometimes, cleaning headlamp lenses at home is not enough. Some problems need expert care to fix properly. Knowing when to seek professional help saves time and avoids more damage. Here are signs that show it is time to visit a specialist.
Severe Yellowing
Yellowing that covers the entire lens often means deep damage. Simple cleaning can remove surface stains but not this. Professionals have tools and chemicals to restore clarity safely. This ensures better light output and safer driving.
Cracks And Physical Damage
Cracks or chips in the lens can let moisture inside. This causes fogging and reduces light strength. DIY repair may not fix these issues well. Experts can replace or repair damaged lenses to keep them sealed and clear.
Warranty And Replacement Options
Check if your vehicle’s headlamps are still under warranty. Some repairs or replacements may be free or low cost. Professionals can guide you through this process and handle the replacements correctly. This protects your investment and ensures quality parts.
Credit: www.homedepot.com
Frequently Asked Questions
How Often Should I Clean Headlamp Lenses?
Clean headlamp lenses every 3 to 6 months. Regular cleaning maintains brightness and improves nighttime visibility. Frequent cleaning prevents dirt buildup and yellowing, ensuring safer driving conditions.
What Household Items Can Clean Headlamp Lenses Effectively?
Use toothpaste or baking soda mixed with water to clean lenses. These mild abrasives remove grime and oxidation safely. Apply gently with a soft cloth for best results.
Can I Use Commercial Kits To Restore Headlamp Lenses?
Yes, commercial headlamp restoration kits work well. They include sanding pads, polish, and sealant. Kits provide a thorough cleaning and protect lenses from future damage.
Is It Necessary To Protect Lenses After Cleaning?
Protecting lenses after cleaning is important. Apply a UV sealant or wax to prevent yellowing and damage. This extends the clarity and life of your headlamp lenses.
Conclusion
Clean headlamp lenses help you see better and drive safer. Regular cleaning stops dirt and grime from building up. Use gentle tools and mild cleaners to avoid damage. Small effort keeps your headlights bright and clear. Don’t forget to check lenses often for cloudiness or cracks.
Clear lenses improve night vision and reduce accidents. Keep your car’s lights shining for safer trips every time. Simple steps can make a big difference on the road.