When it comes to keeping your tent dry and protected, seam sealing is a game-changer. But here’s the question: should you seam seal the inside or the outside of your tent?
This small detail can make a big difference in how well your tent performs during those rainy nights. If you’ve ever wondered where exactly to apply the sealant for the best results, you’re in the right place. Let’s clear up the confusion and help you get the most out of your tent, so you can enjoy your outdoor adventures without worrying about leaks.
Keep reading to find out the best seam sealing method for your gear.
Seam Sealing Basics
Seam sealing is an important step in tent care. It helps keep water out and makes your tent last longer. Knowing the basics of seam sealing can save you from wet nights and damaged gear. This section explains what seam sealing does and the types of seams found in tents.
Purpose Of Seam Sealing
Seam sealing stops water from leaking through tent seams. Seams are where two pieces of fabric join. These joins often have small holes from stitching. Water can enter through these holes during rain. Seam sealing covers these holes with a waterproof layer. This keeps the inside of your tent dry. It also protects the fabric from wear and tear. Proper seam sealing improves tent durability and comfort.
Types Of Tent Seams
Tents have different seam types based on design and use. Flat-felled seams fold fabric edges inside and stitch them down. They are strong and reduce water entry. French seams enclose raw edges with a second seam. They look neat and resist water well. Some tents use taped seams, covered with waterproof tape. This tape blocks water better than just sewing. Knowing your tent’s seam type helps choose the right sealing method.
Inside Seam Sealing
Inside seam sealing is a popular method to waterproof your tent. It involves applying sealant on the inner side of the tent’s seams. This protects the tent from leaks and keeps you dry during rain. Many campers prefer inside sealing because it is easier to apply and inspect. It also prevents the sealant from wearing off quickly.
Advantages Of Inside Sealing
Inside sealing keeps the outer fabric smooth and clean. It avoids extra buildup on the outside that can attract dirt. The sealant stays protected from sun damage and abrasion. This method offers long-lasting waterproofing. It also allows you to check for any missed spots inside the tent. Inside sealing keeps the tent looking neat and professional.
Common Methods Used
Most people use waterproof seam tape or silicone sealant inside the tent. Seam tape is sticky and easy to apply along the seam lines. Silicone sealant needs a brush or applicator for even spreading. Some campers use a combination of both for better protection. Cleaning the seam area before sealing is important. Let the sealant dry fully to ensure strong adhesion.
When To Choose Inside Sealing
Choose inside sealing if your tent fabric is delicate. It works well for tents with coated or laminated fabrics. This method suits tents that face heavy rain and wind. Inside sealing is good if you want to avoid visible sealant outside. It is also helpful for quick repairs during a camping trip. Inside sealing is ideal for maintaining tent appearance and durability.
Outside Seam Sealing
Outside seam sealing means applying sealant on the tent’s outer seams. This method blocks water before it soaks through the fabric. It is a popular choice among campers who want to keep their tents dry during rain. Outside sealing protects the tent’s structure and helps prevent leaks.
Benefits Of Outside Sealing
Outside sealing stops water from entering the seams. It strengthens the tent’s outer layer and adds durability. This method also makes it easy to spot and fix leaks. The sealant dries faster outside, reducing the risk of mold. It keeps the inside of the tent clean and dry.
Techniques For Outside Application
Start by cleaning the seams with a damp cloth. Use a brush or applicator to spread the sealant evenly. Avoid applying too much sealant, which can cause clumps. Let the sealant dry completely before packing the tent. Repeat the process if needed for extra protection.
Situations Favoring Outside Sealing
Outside sealing works best in heavy rain and wet climates. It suits tents with simple seam designs. This method is good for quick repairs during camping trips. It also fits tents made from materials that hold sealant well. Outside sealing helps when inside access is limited or tight.

Credit: www.reddit.com
Tools And Materials
Seam sealing a tent helps keep water out and extends the tent’s life. Choosing the right tools and materials makes the job easier and more effective. Good products and proper tools ensure strong, lasting seams. This section explains popular seam sealants and essential tools for application.
Popular Seam Sealants
Many seam sealants work well on tents. Silicone-based sealants create a waterproof barrier and stay flexible. Polyurethane sealants offer strong adhesion and durability. Some sealants come in liquid form for easy spreading. Others come in tape form for quick sealing. Look for sealants made for outdoor fabrics. They resist water, heat, and wear. Choose a sealant that matches your tent’s fabric type.
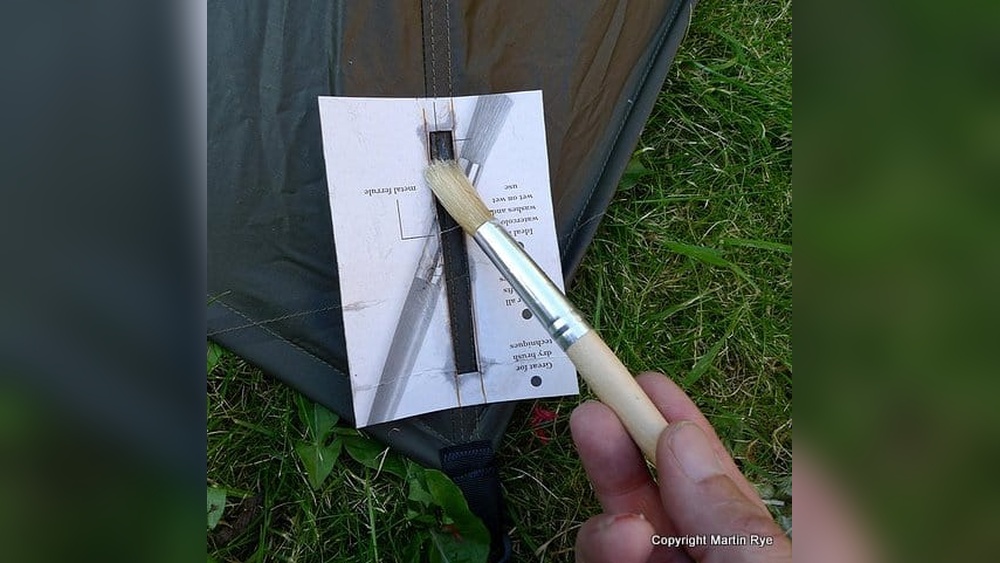
Essential Tools For Application
Applying seam sealant needs a few simple tools. A small brush helps spread liquid sealant evenly. A clean cloth wipes away excess sealant. Gloves protect your hands from sticky chemicals. Masking tape keeps the sealant neat and prevents mess. A small container holds the sealant during work. Good lighting helps you see all seams clearly. These tools make sealing faster and cleaner.
Step-by-step Seam Sealing Guide
Seam sealing is a key step to keep your tent waterproof. This guide breaks down the process into easy steps. Follow each step carefully for the best results. You will learn how to seal both inside and outside seams. Proper sealing protects your tent from rain and wind. Let’s get started.
Preparing The Tent Surface
Clean the tent seams thoroughly. Use mild soap and water to remove dirt. Let the fabric dry completely before sealing. Avoid using strong chemicals that can damage the fabric. Use a soft cloth or sponge for cleaning. Make sure seams are free of dust and oils. This helps the sealant stick better.
Applying The Sealant Inside
Turn the tent inside out to access the seams. Use a small brush or applicator for precise application. Apply the sealant evenly along the stitching lines. Cover the entire seam tape and needle holes. Avoid thick layers to prevent stiffness. Let the sealant soak into the fabric fibers. This step strengthens the tent’s waterproof barrier.
Applying The Sealant Outside
Flip the tent to the outside surface. Use the same brush or applicator to apply sealant on outside seams. Focus on areas where water usually collects. Spread the sealant thinly but completely over seams. This prevents water from entering through fabric pores. Smooth out any bubbles or lumps for a neat finish. Outside sealing adds extra protection against rain.
Drying And Curing Tips
Allow the sealant to dry in a warm, ventilated space. Avoid direct sunlight or extreme heat. Drying times vary but usually take 24 hours. Check the seams for tackiness before packing the tent. If still sticky, wait longer to cure fully. Proper drying ensures strong, flexible seams. Your tent will stay dry and ready for your next trip.
Credit: seekoutside.com
Common Mistakes To Avoid
Seam sealing a tent keeps water out and extends its life. Many campers make simple mistakes that reduce sealant effectiveness. Avoiding these errors helps keep your tent dry and strong. Focus on proper use and preparation for best results.
Overuse Of Sealant
Too much sealant can cause problems. It may clog stitching and slow drying. Thick layers crack or peel easily. Use a thin, even coat for better protection. Apply sealant only where seams need it.
Ignoring Seam Condition
Seams must be in good shape before sealing. Torn or frayed seams let water seep through. Check carefully for damage and fix it first. Sealant cannot fix broken stitches or holes.
Poor Surface Preparation
Clean seams are essential for good adhesion. Dirt, dust, or old sealant stop new sealant from sticking. Wipe the surface well and let it dry fully. Use mild soap and water for cleaning seams.
Maintaining Seam Seals
Maintaining seam seals is key to keeping your tent waterproof and durable. Seam seals stop water from leaking through stitched areas. Over time, wear and weather can damage these seals. Regular care helps your tent stay dry and strong for many trips.
Regular Inspections
Check your tent seams before and after every trip. Look for cracks, peeling, or worn-out sealant. Pay close attention to corners and high-stress areas. Catching damage early prevents bigger leaks and repairs later.
Reapplying Sealant
Apply seam sealant to damaged or worn seams to restore waterproofing. Use sealant made for your tent fabric. Clean seams and let them dry before applying. Spread sealant evenly and let it cure fully for best results.
Storage Tips For Longevity
Store your tent dry and clean to protect seam seals. Avoid folding in the same spots to reduce stress. Keep it in a cool, dark place away from sunlight. Proper storage helps sealant last longer and keeps your tent ready.
Credit: seekoutside.com
Expert Recommendations
Experts offer clear advice on seam sealing tents. Their guidance helps campers protect tents from leaks. Knowing the best methods improves tent durability and comfort. Below are key tips from experienced outdoorsmen.
Choosing The Best Method
Seam sealing inside or outside depends on the tent fabric and design. Many experts prefer sealing outside for easier application and inspection. Outside sealing prevents water from entering the seams directly. Inside sealing suits tents with delicate outer layers. It also adds a second protective layer. Testing a small area first prevents damage.
Sealant Brands Experts Trust
Experts recommend sealants known for flexibility and waterproofing. Popular brands include Gear Aid, Seam Grip, and McNett. These products bond well to nylon and polyester tents. They dry clear and remain flexible in cold weather. Choosing a sealant made for your tent fabric ensures best results.
Timing Your Seam Sealing
Seal tents when they are clean and dry. Experts advise sealing seams before first use and before long trips. Reapply sealant yearly or after heavy rain exposure. Avoid sealing in cold or humid conditions. Warm, dry weather helps the sealant cure faster. Proper timing extends the life of your tent.
Frequently Asked Questions
Do You Seam Seal Inside Or Outside Of A Tent?
Seam sealing is done on the outside of a tent to prevent water from entering. Applying sealant outside protects seams from rain while maintaining interior dryness and comfort. Inside sealing is not effective for waterproofing.
Why Is Outside Seam Sealing Better For Tents?
Outside seam sealing blocks water before it reaches the fabric. It strengthens the tent’s waterproof barrier and prevents leaks. Inside sealing may trap moisture inside, causing mildew and damage.
How Often Should Tent Seams Be Resealed?
Reseal tent seams annually or after heavy use. Regular inspection helps detect worn or cracked sealant. Timely resealing ensures lasting waterproof protection.
Can You Seam Seal A Tent Yourself?
Yes, you can seam seal your tent at home. Clean seams, apply sealant evenly outside, and let dry fully. DIY sealing saves money and extends tent life.
Conclusion
Seam sealing tents protects against water leaks effectively. Applying sealant outside keeps water from entering seams. Sealing inside adds extra protection but needs care. Choose the method that fits your tent type. Always let the sealant dry fully before camping.
Proper seam sealing extends your tent’s life. Stay dry and enjoy your outdoor adventures comfortably. Simple steps make a big difference in tent care. Try both methods to see what works best. Keep your tent safe from rain every time.