
Imagine having a tent that feels like it’s barely there, yet keeps you safe and dry no matter where you go. What if you could build that tent yourself, saving money and customizing it exactly to your needs?
You’re about to discover simple steps to make your own ultralight tent that’s perfect for hiking, camping, or any outdoor adventure. Ready to lighten your load and boost your freedom? Keep reading—your next trip will never be the same.

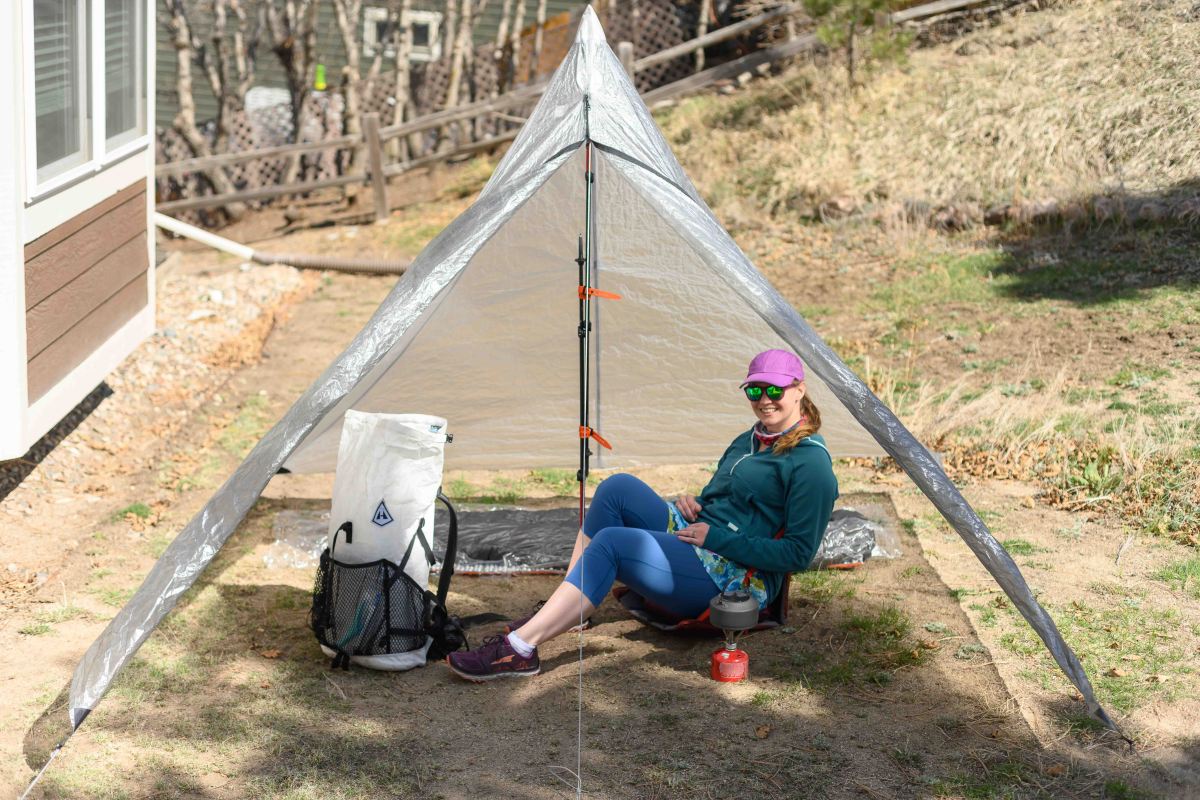
Credit: www.greenbelly.co
Choosing Materials
Choosing the right materials is the first step to make an ultralight tent. The materials affect weight, durability, and comfort. Picking the best fabric, poles, and seam supplies helps build a strong and light shelter. Understanding each material’s role guides your choices for a perfect tent.
Fabric Options
Fabric is the main part of your tent. Nylon and polyester are common choices. Nylon is light and strong but can absorb water. Polyester handles sunlight better and dries fast. Ripstop fabrics prevent small tears from growing. Silicone or polyurethane coatings add water resistance. Pick fabric weight carefully to balance strength and lightness.
Poles And Stakes
Poles hold your tent up. Aluminum poles are light and sturdy. Carbon fiber poles weigh less but cost more and can break easier. Fiberglass poles are cheap but heavy and less durable. Stakes keep your tent grounded. Aluminum stakes are light and strong. Plastic stakes are light but may bend or break in hard soil. Choose poles and stakes that fit your weight and strength needs.
Seam Taping Supplies
Seam taping keeps your tent waterproof. Use waterproof tape designed for tents. This tape seals needle holes and prevents leaks. Seam sealant liquids are good for small repairs or edges. Clean and dry seams before applying tape or sealant. Proper seam sealing stops rain from soaking through. It also makes your tent last longer and stay dry.
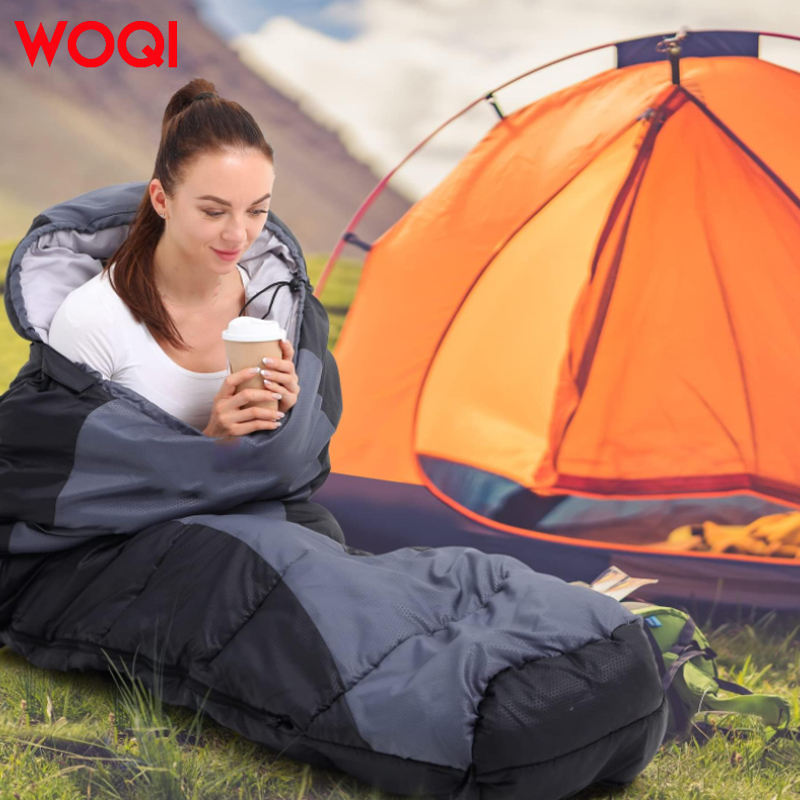
Credit: cameronfedde.wordpress.com
Designing Your Tent
Designing your ultralight tent is the first step in creating a shelter that suits your needs. This process helps you plan every detail. It saves time and materials later.
Good design balances weight, space, and weather protection. Think about where and how you will use your tent. This guides your choices in style, size, and shape.
Selecting Tent Style
Choose a tent style that fits your outdoor activities. Single-wall tents are light and simple. They dry fast but may have less ventilation.
Double-wall tents offer better breathability. They have a separate rainfly and inner tent. This adds weight but improves comfort.
Consider freestanding versus non-freestanding designs. Freestanding tents stand without stakes. Non-freestanding tents need staking but often weigh less.
Determining Dimensions
Decide how many people will use the tent. Add extra space for gear storage. A snug fit saves weight but may feel cramped.
Think about tent height. Taller tents give more room but use more fabric. Lower tents are lighter and better for wind resistance.
Measure the floor size based on your sleeping pad and gear. Add 6 to 12 inches on each side for comfort.
Drafting A Pattern
Draw your tent parts on paper or fabric. Start with the floor, then walls and roof sections. Use simple shapes to make cutting easier.
Mark seam allowances clearly. This space is needed for sewing edges together. Check your measurements twice before cutting fabric.
Label each piece with its position and orientation. Keep your pattern organized to avoid confusion during assembly.
Cutting And Preparing Fabric
Cutting and preparing fabric is a key step in making an ultralight tent. This process helps shape the tent and ensures it will be strong and light. Precise cutting saves fabric and reduces weight. Preparing the edges prevents fraying and adds durability. Follow these steps to get the best results.
Measuring And Marking
Start by measuring the fabric carefully. Use a tape measure or ruler for accuracy. Mark the fabric with a fabric pencil or chalk. Draw clear lines where you will cut. Double-check your measurements before cutting. Mark all parts you need for the tent panels.
Cutting Techniques
Use sharp scissors or a rotary cutter for clean cuts. Cut slowly along the marked lines. Avoid jagged edges that can weaken the fabric. Keep the fabric flat and smooth while cutting. Use a cutting mat if using a rotary cutter. This protects surfaces and helps precision.
Edge Finishing
Finish the edges to stop fraying. Use a zigzag stitch or a serger if available. Fold the edges slightly before sewing. This adds strength and neatness. If sewing is not an option, use fabric glue or tape. Proper edge finishing extends the tent’s life and keeps it light.
Sewing The Tent Body
Sewing the tent body is an important step in building your ultralight tent. This part holds the fabric together and shapes the tent. Strong, neat stitches make the tent last longer and resist wind and rain. Choose the right stitch and add reinforcements for durability. Adding mesh panels can improve ventilation and keep bugs out.
Stitch Types
Choose a stitch that holds fabric well and does not tear easily. A straight stitch is simple and strong for most parts. Use a zigzag stitch on stretchy fabric or edges to prevent fraying. Double stitching adds extra strength to critical areas. Keep stitches short and even for better hold.
Seam Reinforcement
Seams are weak points in the tent body. Reinforce them with extra fabric strips or tape. Sew a second line of stitches next to the first one for added strength. Use strong thread designed for outdoor gear. Make sure reinforcement does not add too much weight.
Adding Mesh Panels
Mesh panels improve airflow and reduce inside moisture. Cut mesh fabric to fit tent openings or windows. Sew mesh edges carefully with small stitches to avoid holes. Attach mesh inside the tent body to protect from bugs. Check mesh for tears and repair quickly.
Constructing The Tent Floor
The tent floor forms the base of your shelter. It protects you from wet ground and sharp objects. Building a strong, lightweight floor is key to a good ultralight tent. Focus on materials that last and keep water out. Also, make sure the floor fits well with the tent body. This keeps you dry and comfortable during your trip.
Selecting Durable Materials
Choose fabrics that resist tears and wear. Ripstop nylon and polyester are popular choices. These materials are light but strong. Look for ones with a denier rating between 15 and 30. Lower denier means lighter fabric, but less durability. Balance weight and strength for your needs. Consider adding a silicone or polyurethane coating for extra toughness.
Waterproofing Methods
Waterproofing stops moisture from seeping through the floor. Use waterproof coatings like silicone or polyurethane. Apply these evenly on the fabric surface. Seam sealing is essential too. Seal all stitching lines with waterproof tape or liquid sealant. Test the floor by sprinkling water to check for leaks. Reapply sealant as needed to keep the floor dry.
Attaching To Tent Body
Secure the floor to the tent walls to prevent gaps. Use strong, lightweight zippers or Velcro strips. Sew or tape attachment points carefully. Make sure the floor is taut but not stretched. This prevents water pooling and improves stability. Check the connection before each trip for any damage or wear.
Assembling Poles And Frame
Assembling the poles and frame is a key step in making your own ultralight tent. The poles hold the tent up and give it shape. A strong, light frame makes the tent easy to carry and stable in the wind. Careful assembly ensures your tent lasts for many trips.
Pole Materials
Choose materials that are light but strong. Aluminum and carbon fiber are popular choices. Aluminum is affordable and durable. Carbon fiber is lighter but costs more. Fiberglass can be an option but is heavier and less durable. Pick poles that match your budget and weight needs.
Frame Construction
The frame design affects tent stability and weight. Simple designs use fewer poles and joints. This keeps weight down. Use shock-corded poles that connect easily. Make sure the frame fits your tent size. Test the frame by setting it up before attaching the fabric.
Pole Attachment
Secure poles to the tent fabric with clips or sleeves. Clips are easy to use and quick to set up. Sleeves protect poles but take longer to thread. Reinforce attachment points to prevent tears. Use strong thread or fabric patches at stress points. Proper attachment keeps the tent tight and sturdy.
Adding Doors And Vents
Adding doors and vents is important for any ultralight tent. Doors let you enter and exit easily. Vents help air flow inside. Good airflow stops moisture and keeps you dry. Both features improve comfort on any trip. This section shows how to add them properly.
Zipper Installation
Choose lightweight zippers to keep your tent light. Sew the zipper carefully along the door edge. Use strong thread and small stitches. This stops the zipper from pulling loose. Test the zipper several times before finishing. Make sure it opens and closes smoothly. A well-installed zipper lasts longer and works better.
Ventilation Placement
Place vents high on the tent walls or roof. Warm air rises, so vents here help it escape. Avoid vents near the ground to keep rain out. Use mesh fabric for vents to block bugs. Cover vents with flaps you can open or close. This lets you control airflow based on weather.
Weatherproofing Features
Use waterproof fabric to cover doors and vents. Sew tight seams and apply seam tape to stop leaks. Add storm flaps over zippers and vents for extra protection. Make sure flaps overlap enough to block wind and rain. Test your tent in wet weather to check for leaks. Proper weatherproofing keeps you dry and safe outdoors.
Seam Sealing And Waterproofing
Seam sealing and waterproofing are key steps in making your ultralight tent strong against rain. These steps stop water from leaking through the stitches and fabric joins. Proper sealing keeps you dry and comfortable during wet weather. It also extends the life of your tent by protecting the fabric from damage.
Choosing Sealants
Select sealants that match your tent fabric type. Silicone-based sealants work well on silicone-coated nylon. Polyurethane sealants suit polyurethane-coated fabrics. Avoid cheap sealants that peel off or crack quickly. Look for flexible, durable sealants made for outdoor gear. Read labels to check water resistance and drying time.
Application Techniques
Clean tent seams before applying sealant. Use a small brush or applicator for precise work. Spread sealant evenly over every stitch and hole. Apply thin layers to avoid lumps or runs. Let each layer dry fully before adding another. Seal the inside and outside seams for best protection.
Testing Waterproofing
Test your tent by spraying water on sealed seams. Watch for any leaks or damp spots inside. Fix weak areas by adding more sealant. Also test after the sealant has dried for 24 hours. Use a flashlight inside the tent to spot water coming through. Repeat testing until the tent stays dry.
Final Assembly And Setup
The final assembly and setup of your ultralight tent are key steps. This stage brings all parts together for a secure shelter. Proper setup ensures your tent stands firm and protects you well. Follow these clear steps to complete your tent efficiently.
Attaching Guy Lines
Start by tying guy lines to the tent’s attachment points. Use strong knots like the taut-line hitch for easy adjustment. Keep lines tight but not overly stretched. This adds stability and prevents the tent from swaying in wind.
Stake Placement
Place stakes at a 45-degree angle away from the tent. Push them deep into the ground for firm hold. Space stakes evenly to keep fabric tight. Use sturdy stakes that suit the terrain to avoid loosening.
Pitching Tips
Choose a flat spot free of rocks and debris. Face the tent door away from the wind. Tighten all lines and fabric evenly for a smooth surface. Check the tent’s tension regularly during use to maintain shape and strength.
Credit: catmosphere.org
Weight Saving Tips
Saving weight is the key to making an ultralight tent. Every gram counts when you carry it on your back. Small choices add up to big weight differences. Focus on materials, design, and packing to reduce weight without losing strength or comfort.
Material Selection
Choose lightweight fabrics like silnylon or cuben fiber. These materials are strong and light. Avoid heavy canvas or thick nylon. Use thin but durable tent poles such as aluminum or carbon fiber. Lighter stakes made from titanium or aluminum also help cut weight.
Simplifying Design
Keep the tent design simple and minimal. Use fewer poles and less fabric. Skip extra features like large vestibules or heavy zippers. A single-wall tent reduces layers and overall weight. Focus on essential parts for shelter and ventilation.
Packing Strategies
Pack your tent carefully to avoid extra bulk. Roll or stuff the tent tightly to save space. Use stuff sacks that compress the fabric. Carry only needed accessories and avoid duplicates. Organize the tent parts to prevent damage and weight gain.
Frequently Asked Questions
What Materials Are Best For An Ultralight Tent?
Ripstop nylon and silnylon are popular for ultralight tents. They offer strength, water resistance, and light weight, ideal for backpacking.
How Do I Ensure My Tent Is Waterproof?
Use waterproof coatings like silicone or polyurethane. Seam sealing tape also prevents leaks, keeping your tent dry in wet conditions.
Can I Make An Ultralight Tent On A Budget?
Yes, sourcing affordable yet durable materials helps. DIY methods reduce costs compared to buying commercial ultralight tents.
How Much Does An Ultralight Tent Typically Weigh?
Ultralight tents usually weigh between 1 to 3 pounds. Weight depends on materials, size, and design.
Conclusion
Making your own ultralight tent saves money and gives pride. You control the materials and design to suit your needs. Lightweight gear makes hiking easier and more fun. Remember to test your tent before any big trip. Small steps lead to better outdoor experiences.
Enjoy the freedom of camping with gear you made. Try building your tent to feel closer to nature. Simple, light, and strong—that’s the goal. Your adventure starts with smart, easy choices.